MAKING OF.
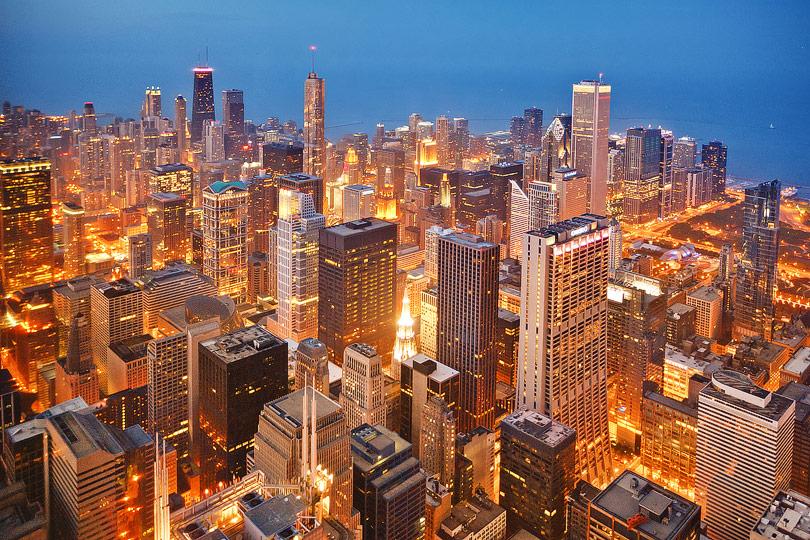
How I edited my photo "Chicago Skyline at night"
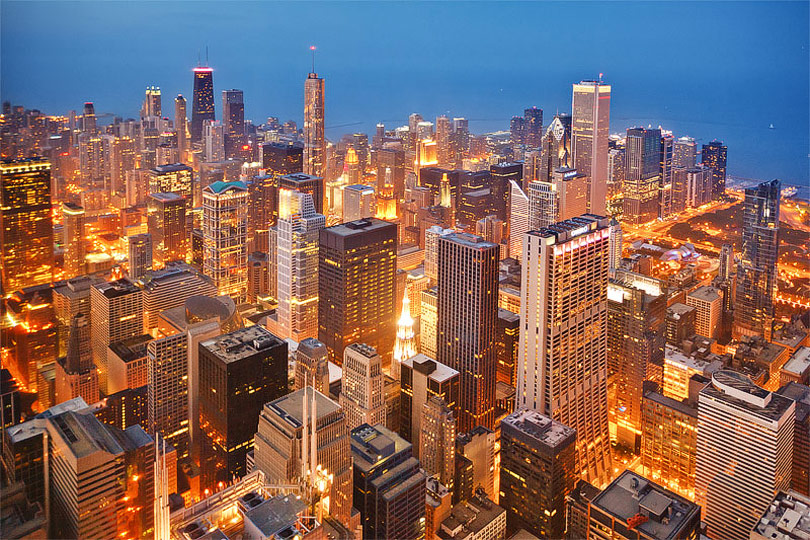
I took the photo on the observation deck of the Willis Tower (formerly Sears Tower) in Chicago. Tripods are not allowed and you have to deal with shooting through a glass pane which results in an unsharp area on the left side. Furthermore lights on the observation deck reflect in the glass pane.
01
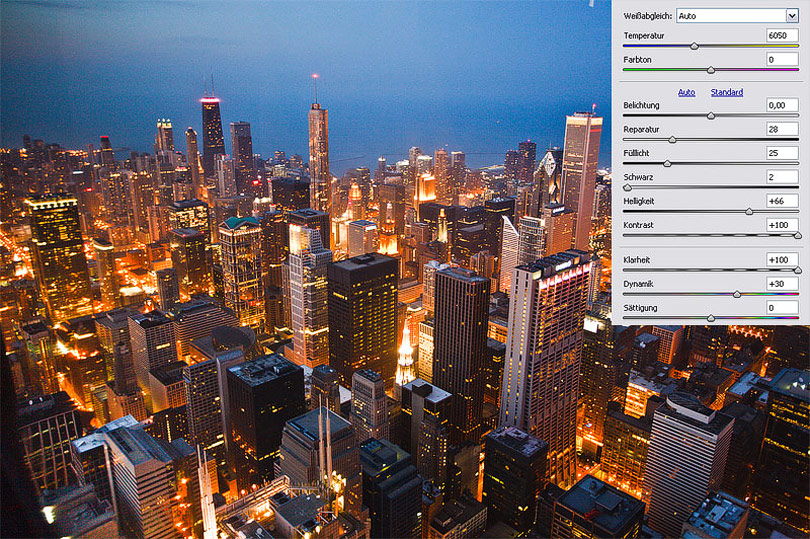
In Camera Raw I do the following adjustments: "Recovery" brings back details in the lights, "Fill Light" brightens up the black areas. "Brightness" does what it says and "Contrast" is set to the maximum to get a boost. "Clarity" accents edges and "Vibrance" increases the saturation. I don't change "Exposure" because it will be handled later with exposure bracketing to get a balanced overall look.
02
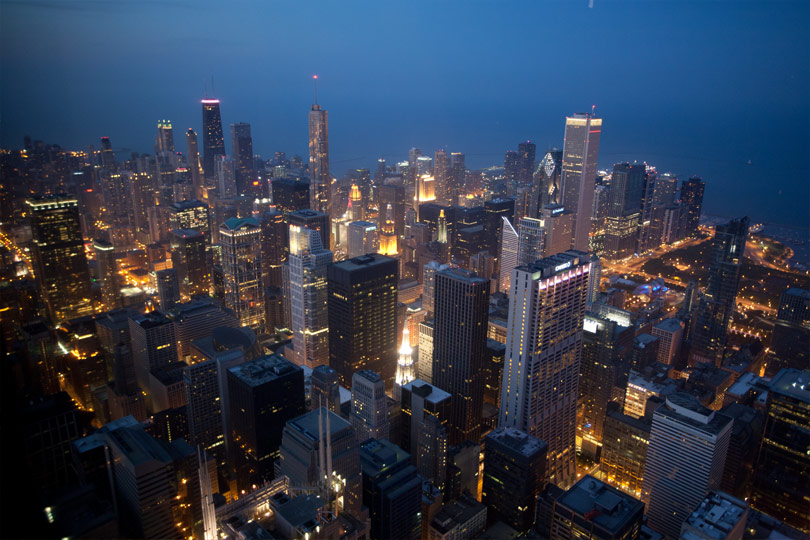
In order to get a well balanced image with details in the shadows and highlights I export five TIFF files in 16 bit with an interval of one exposure value.
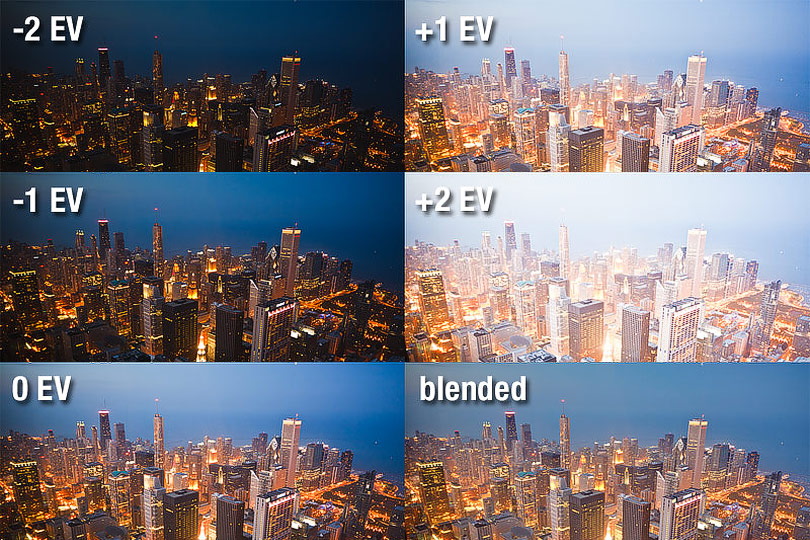
03
The software Enfuse merges these single images to the final blended result.
04
In the next step perspective is corrected to get straight building edges. I use free transform, hold down the CTRL/CMD-SHIFT keys and drag the bottom left and right points. As the image gets stretched in width the overall aspect suffers, hence the distortion compensation in height.

05
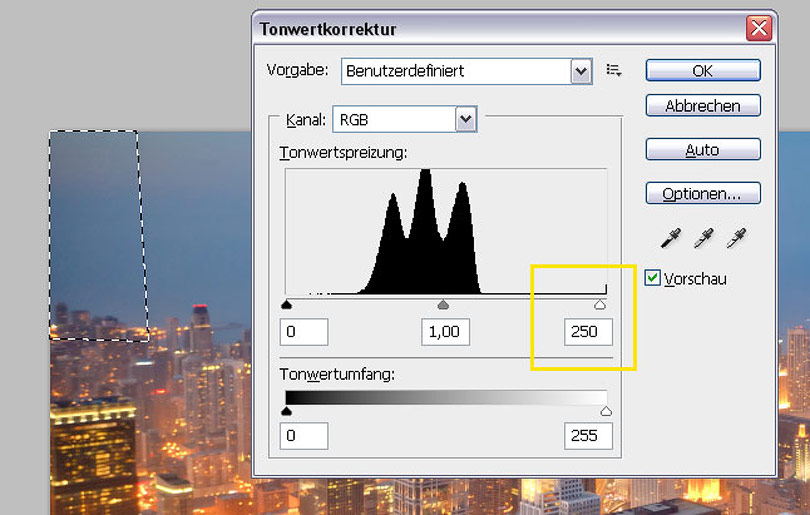
To get rid of the reflections in the glass pane I roughly select the dark areas in the sky and minimally brighten up using levels. In the mask I use the brush tool with low opacity to create a non visible transition.
06
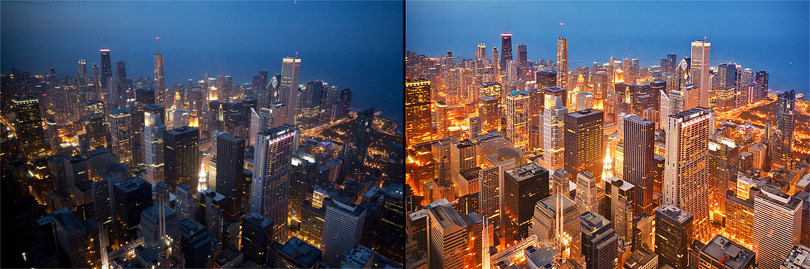
Left the uncorrected version with visible reflection, right the removed disturbance.

07
Additionally I select a blue tone and paint on an empty layer in the color blending mode over the sky which shows different shades of color. The color noise is reduced while all details in the sky remain.

08
I use the Shadow/Highlight filter to flatten the image even more.

09
To enhance colors in the photo I duplicate the layer, change blend mode to "Soft light" and use the Gaussian blur filter with a high amount of about 150px. opacity is reduced until I like the result.

10
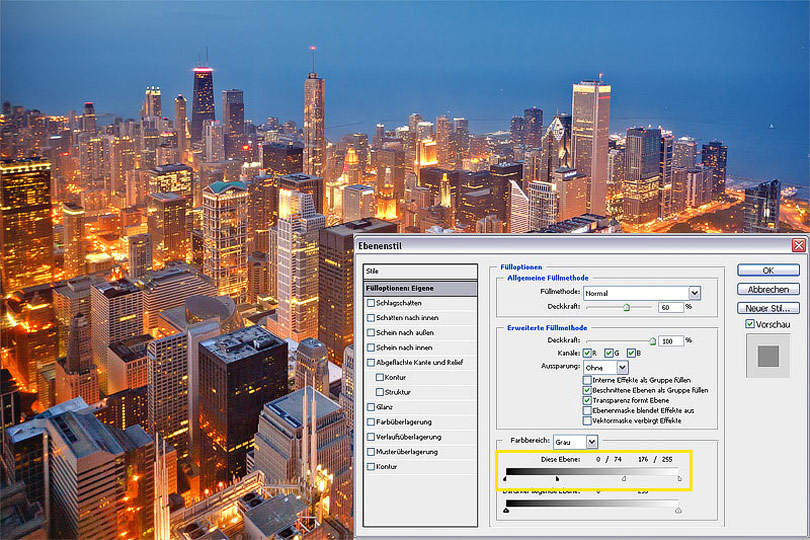
To increase edge contrast I again duplicate the layer and apply the "Unsharp mask" filter with an amount of 30 % and a radius of 60px. To avoid halos I exclude the effect from the shadows and highlights. To achieve this I open the blending options and with hold down ALT/Option key I drag the white and black slider a bit to the center so the enhanced edge contrast only applies in the mid tones.
11
With a classic S-curve in the curves dialog I create a small boost of overall contrast.

12
Finally on an empty new layer in blend mode "color" I choose a warm orange tone and paint over the bottom parts of the image which include a blue tint. Reducing opacity allows me to get a balanced result.
13
Move the slider to compare the original photo with the final result (Mozilla Firefox). In the Internet Explorer alternatively click on any position.